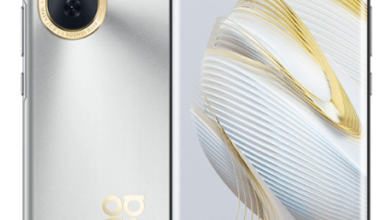
Samsung Galaxy S21 Screen Replacement Guide

The Samsung Galaxy S21 is a flagship smartphone known for its sleek design and powerful features. However, like any electronic device, accidents can happen, and the screen may need to be replaced due to damage or malfunction. This comprehensive guide will walk you through the steps to replace the screen on your Samsung Galaxy S21.
Step-by-Step Guide to Screen Replacement
1. Gather Necessary Tools: Before you begin, it’s essential to gather all the tools you’ll need for the screen replacement process. These typically include a small Phillips screwdriver, a plastic prying tool or guitar pick, a heat gun or hair dryer, and a replacement screen.
2. Power Off the Device: Before you start working on your Galaxy S21, power it off completely to avoid any potential damage or accidents.
3. Remove the SIM Tray: Using a SIM card ejector tool or a paperclip, eject the SIM tray on the device’s top edge. This will allow you to access the internal components more quickly.
4. Apply Heat to the Edge: Use a heat gun or hair dryer to apply Heat to the device’s edges. This Heat will soften the adhesive that holds the screen in place, making it easier to remove.
5. Start Prying the Screen: Once the adhesive is softened, gently insert a plastic prying tool or guitar pick between the frame and the screen. Slowly work around the edges, applying more Heat as needed to loosen the adhesive and separate the screen from the frame.
6. Disconnect the Battery: Locate the battery connector inside the device with the screen partially removed. Use a plastic spudger or similar tool to carefully disconnect the battery connector to prevent accidental short circuits during the repair process.
7. Remove the Screws: With the battery disconnected, you can now access the screws that hold the screen in place. Use a small Phillips screwdriver to remove these screws and set them aside in a safe place.
8. Disconnect Flex Cables: Once the screws are removed, you’ll need to disconnect any flex cables attached to the screen, including the display cable and any other connectors. Take care when disconnecting these cables to avoid damaging them.
9. Install the New Screen: With the old screen removed, carefully align the new screen and reconnect all the flex cables to their respective connectors. Ensure the wires are securely connected to avoid display or touch sensitivity issues.
10. Reassemble the Device: Once the new screen is installed and all the cables are connected, it’s time to reassemble your Galaxy S21. Carefully place the screen back into position and secure it with the screws you removed earlier. Make sure to apply new adhesive around the edges of the screen before attaching it to the frame to ensure a secure fit.
11. Test the Screen: Before fully reassembling the device, it’s essential to test the new screen to ensure it functions correctly. Power on your device and check for display abnormalities or touch sensitivity issues. If everything looks good, you can proceed with reassembly.
12. Replace the SIM Tray: Once you’re confident that the new screen is working correctly, insert the SIM tray back into the device and ensure it is seated securely.
Tips and Precautions
Take Your Time: Screen replacement can be a delicate process, so it’s essential to take your time and work carefully to avoid causing any further damage to your device.
Use Proper Tools: Ensure you have the right tools for the job, including a good quality Phillips screwdriver and a plastic prying tool or guitar pick to prevent scratching or damaging the device.
Be Mindful of Adhesive: The adhesive used to secure the screen can be pretty intense, so take care when prying the screen away from the frame to avoid damaging the display or other components.
Double-Check Connections: Before reassembling the device, double-check that all flex cables and connectors are securely seated to avoid issues with the new screen.
Conclusion
Replacing the screen on your Samsung Galaxy S21 can seem daunting, but with the right tools and careful attention to detail, it’s a repair that you can tackle yourself. Following the step-by-step guide outlined above and taking proper precautions, you can breathe new life into your device and enjoy a fully functional screen again. If you need more time to perform the repair yourself, consider seeking assistance from a professional repair service to ensure the job is done correctly.


