
Quilting is a craft that involves exactitude, as one of the things that would require precise attention is how to conceal the knot when you start or end a strand of stitching. This may be the reason behind the choicest displays, as there is an equal chance to go for the backyard beauty and those that are flawlessly done. Let me show you an easy way to hide quilting knots.
Content Explore:Best Sewing Machine for Advanced Sewers
Understanding the Knot
Generally, you tie up the thread with a knot when you start or finish a whole stitching line. While a hand-tied knot can ruin the visualization, a machine-bound or ultra-modern knot can create a mess. To the point, hiding the knot is the quilters’ art, which must be mastered.


Discuss the Different Array Sizes and Steps for Hiding the Knot
There are many ways to make the knot disappear while quilting, too. Here are a few methods: Here are a few methods:
Read More Content:Best budget sewing machines
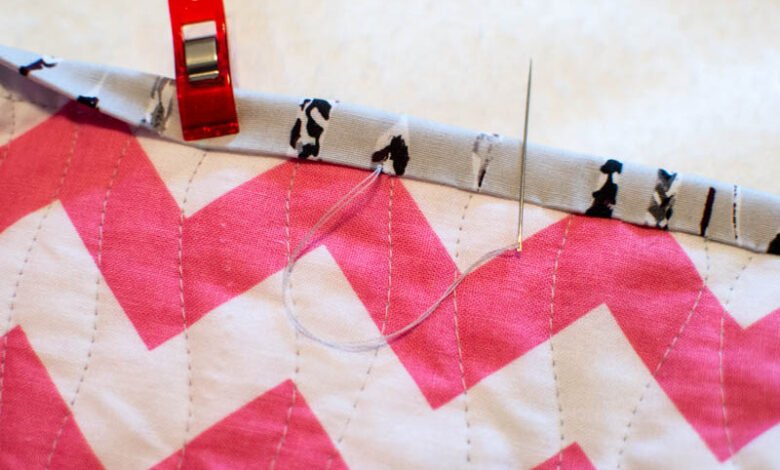
1. The Quilter’s Knot
The Quilt Knot, for example, is primarily employed by different quilters. Here’s how you do it: Here’s how you do it:
- With the needle in your right hand, carefully thread the needle securely in your left hand with the opposite end of the thread.
- Use the right hand to hold the needle in your hand and make three thread turns around it.
- To get the wraps, first grip onto them and then pull the needle through them and create a knot with the ends of the thread with the needle.
- Insert the needle into the top layer and batting (in between tier layers), but don’t go through the back. Approach and space properly.
- Mildly pull the thread until the knots come from the quilt top, wadding at the bottom backspace, and camouflage.
2. The Away Knot
The Away Knot is another method that can be used:
- Finish first by tying the thread to a knot.
- Insert the needle onto the quilt top 4-5 inches from where the stitching starts, and proceed below.
- Ser and fasten in situ, leaving the yarn tail long.
- With that done, you should shorten the thread by approximately four cm and stitch it back to the Away Knot. Then clip the knot and, using a hand needle, thread the loose tail through the loop to finish the knot and secure it.
- Now, prick the end of the needle on the hole where you established the Away Knot and make sure it comes out approximately an inch.
- Tug until the silk tail is buried deep inside the quilt layers.
3. The Ladder Stitch
The Ladder Stitch is a method used to Hide the Knot when finishing a line of stitching:
- When you arrive at the point where you have finished stitching, make a small secure back stitch and insert the needle and thread, ready for the next twist of the pattern.
- At a fold on the fabric, take a stitch perfectly opposite to a backstitch, and then take a stitch in an opposite position of the other side.
- Continue this process until you have created several ‘rungs’ of a ladder.
- Pull the thread tight, and the stitches will disappear, hiding the knot.
Conclusion
They hide the knot when quilting, giving your quilt a professional finish. With practice, these techniques will become second nature. Happy quilting!